Changing a bag in a bag-in-box system is a straightforward process that ensures continuous dispensing of your chosen liquid. This task is essential for maintaining efficiency in commercial settings or simply enjoying uninterrupted access to your favorite beverage at home. By following a few key steps, you can quickly and easily replace an empty bag with a fresh one, minimizing downtime and maximizing convenience.
This guide will walk you through the typical procedure for replacing a bag in a standard bag-in-box setup. We’ll cover the necessary steps from safely disconnecting the empty bag to correctly installing a new one, ensuring a secure and leak-free connection. With these instructions, you’ll be able to handle bag replacements with confidence and ease.
What Is Bag-in-Box

Bag-in-box (BIB) is a packaging system designed for storing and dispensing liquids and semi-liquids. It consists of a durable, multi-layered plastic bag contained within a protective corrugated cardboard box. This design effectively shields the contents from external elements like air and light, significantly extending the product’s shelf life compared to traditional packaging methods.
The system typically incorporates a dispensing tap or valve, allowing for controlled and convenient pouring without compromising the remaining product’s freshness. As the contents are dispensed, the bag collapses, preventing air from entering and further preserving the quality. Bag-in-box is widely utilized across various industries for products ranging from beverages and sauces to cleaning solutions and industrial chemicals, offering a cost-effective and efficient packaging solution.
Recommended Bag-in-Box


How to Change Bag in Box?

Replacing a bag-in-box might seem daunting initially, but it’s a simple process designed for user convenience. By following a few key steps, you can easily replace an empty bag and ensure a continuous flow of your desired product. This guide will walk you through the process, making it a hassle-free task.
Let’s get started!
Step 1: Prepare for the Changeover
First, ensure you have a replacement bag that is compatible with your current bag-in-box system. Check the size and fitment type to avoid any issues during installation. It’s also a good idea to have a clean cloth or paper towels handy to wipe up any potential spills. Make sure the area around the bag-in-box is clear and you have enough space to work comfortably. Having everything prepared beforehand will make the replacement process smoother and quicker for you.
Before you begin, locate the dispensing tap on the empty bag and ensure it is in the closed position to prevent any residual product from leaking. If your system has a retaining clip or mechanism securing the tap, disengage it carefully. Having a clear understanding of how your specific system’s tap is secured will prevent any accidental damage. Taking a moment to familiarize yourself with these details will save you time and frustration during the actual bag replacement.
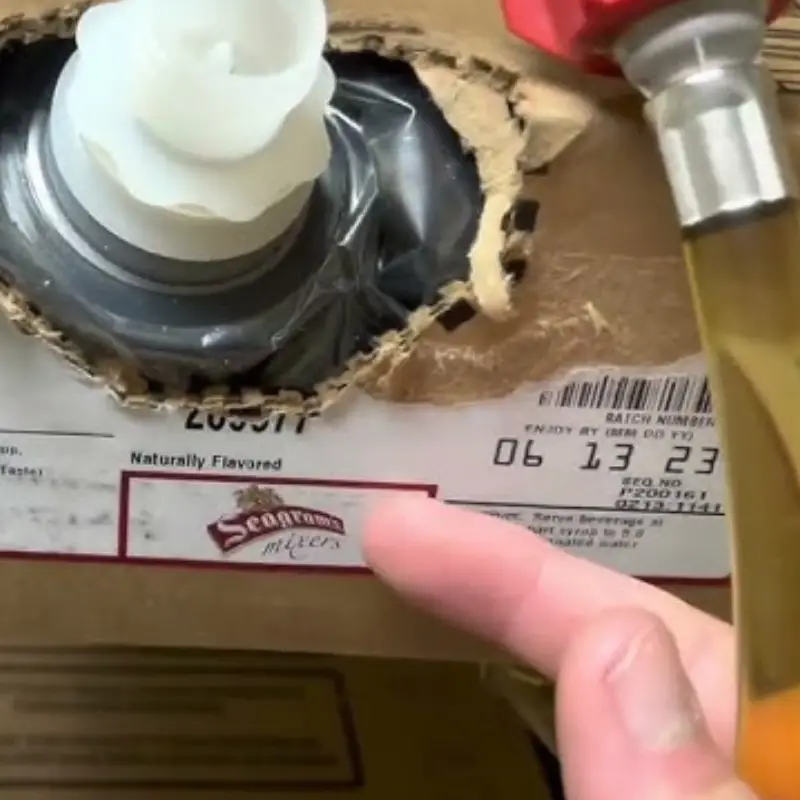
Step 2: Access the Empty Bag
Next, open the outer cardboard box of your bag-in-box system. You’ll typically find a perforated or designated opening flap that allows you to access the inner bag. Carefully open this flap, ensuring you don’t tear the cardboard excessively, as it will continue to house the new bag. Once the box is open, you should be able to clearly see the empty bag and its connection to the dispensing tap. Having a good view of the internal components will aid in the removal process.
Gently pull the empty bag out of the box. Be mindful of any remaining liquid inside, as it could cause spills. Disconnect the dispensing tap from the empty bag. This usually involves a simple detachment mechanism, such as a quick-connect fitting or a threaded connection. Take your time during this step to avoid any sudden movements that could lead to messes. Once the tap is free, you can safely remove and dispose of the empty bag according to your local recycling guidelines.
Step 3: Prepare the New Bag
Now, take your new bag-in-box replacement and carefully remove any protective packaging it may have. Locate the fitment on the new bag, which will connect to your dispensing tap. Ensure that the fitment is clean and free from any debris that could contaminate your product. Inspect the new bag for any signs of damage that may have occurred during shipping or handling. Taking a moment to check the integrity of the new bag will prevent potential issues after installation.
Orient the new bag so that the fitment is easily accessible for connection to the dispensing tap. If your new bag has a protective cap on the fitment, remove it carefully. Be sure to keep this cap in a clean place if it’s designed for reuse. Familiarizing yourself with the new bag’s fitment and ensuring its readiness will make the connection process seamless. Having the new bag properly oriented will save you time and effort during the next step.
Step 4: Connect the New Bag
Carefully attach the dispensing tap to the fitment on the new bag. Ensure a secure and tight connection to prevent any leaks during dispensing. If your system uses a quick-connect fitting, push it firmly onto the fitment until it clicks into place. For threaded connections, gently screw the tap onto the fitment until it is snug, but avoid over-tightening, which could damage the components. A proper connection is crucial for the functionality and longevity of your bag-in-box system.
Once the tap is securely connected, gently tug on it to ensure it is firmly attached and won’t detach during use. If your system has a retaining clip or mechanism for the tap, re-engage it to provide additional security. Double-checking the connection will prevent any unexpected disconnections and ensure a smooth dispensing experience for you. Taking this extra moment for verification will give you peace of mind.
Step 5: Insert the New Bag
Carefully slide the new bag into the outer cardboard box. Arrange the bag so that it sits comfortably inside without being excessively folded or compressed, which could potentially damage it. Ensure the dispensing tap extends through the designated opening in the box, allowing for easy access. Proper placement of the new bag within the box will contribute to the overall stability and functionality of the system.
Once the bag is inside the box, ensure that the dispensing tap is positioned correctly and any retaining clips or mechanisms are securely fastened. Close the access flap of the cardboard box, ensuring it is properly sealed to protect the inner bag from dust and other contaminants. A well-sealed box also provides additional structural support to the bag. Taking care to properly enclose the new bag will help maintain the quality of your product.
Step 6: Prime the System (If Necessary)
Depending on your specific bag-in-box system and the type of product you are using, you might need to prime the system after installing a new bag. Priming typically involves dispensing a small amount of the product to remove any air that may have entered the lines during the bag change. Consult your system’s instructions for specific priming procedures if required. This step ensures a consistent and smooth flow of the product when you begin dispensing.
To prime the system, place a suitable container under the dispensing tap and open it. Allow a small amount of the product to flow out until you see a steady stream without any air bubbles. Once the air is purged, close the tap. Priming ensures that the product is readily available and that you get an accurate pour from the first use. This simple step can significantly improve your dispensing experience.
When to Replace Bag-in-Box
Knowing when to replace the bag in your bag-in-box system is crucial for maintaining a seamless dispensing process and preventing interruptions. Several indicators signal the need for a replacement, ensuring you don’t run out of your desired liquid unexpectedly.
Paying attention to these signs will help you proactively manage your bag-in-box system and avoid any inconvenience.
Empty or Near Empty Bag:
The most obvious sign is when the flow of the product slows significantly or stops altogether. This indicates that the bag is either completely empty or contains a minimal amount of liquid. Continuing to attempt dispensing from an empty bag can introduce air into the dispensing lines, potentially requiring priming of the system after replacement. Regularly checking the weight or feel of the box can provide a good indication of the remaining contents.
Difficulty Dispensing:
If you notice increased resistance or sputtering when trying to dispense, it could mean the bag is nearing empty and the remaining liquid is not flowing smoothly. This can also occur if the bag has become twisted or compressed within the box, obstructing the flow. Persistent difficulty in dispensing, even when the box feels like it still has some weight, warrants checking and potential replacement of the bag to ensure consistent output.
Visible Bag Collapse:
As the liquid is dispensed, the inner bag collapses. Observing a completely flattened bag, especially if the dispensing has become difficult, suggests it’s time for a replacement. While the collapsing action is normal and prevents air from entering, a fully collapsed bag accompanied by poor flow indicates emptiness. Visually inspecting the bag through the box opening can provide a clear indication of its state.
Pre-Determined Usage:
For commercial settings or high-usage scenarios, establishing a replacement schedule based on estimated consumption can be beneficial. Tracking usage and anticipating when a bag is likely to empty can prevent interruptions in service. This proactive approach ensures a continuous supply and minimizes downtime associated with unexpected empty bags, contributing to operational efficiency.
Conclusion
In conclusion, changing a bag-in-box is a straightforward process that ensures continuous dispensing and minimizes product waste. By following these simple steps, users can efficiently replace empty bags and maintain a seamless flow of their desired liquid. Understanding the mechanics of the system contributes to a positive user experience.
The design of bag-in-box systems prioritizes ease of use, making bag replacement a quick and hassle-free task. This user-friendly feature is a key advantage, especially in high-demand environments. Proper maintenance and timely bag replacement are essential for optimal performance and longevity of the system.
Ready to streamline your dispensing process with reliable and user-friendly bag-in-box solutions? Partner with BN Pack for wholesale options tailored to your business needs. We offer high-quality systems and bags designed for easy replacement and consistent performance. Contact us today to explore our offerings and enhance your operational efficiency.