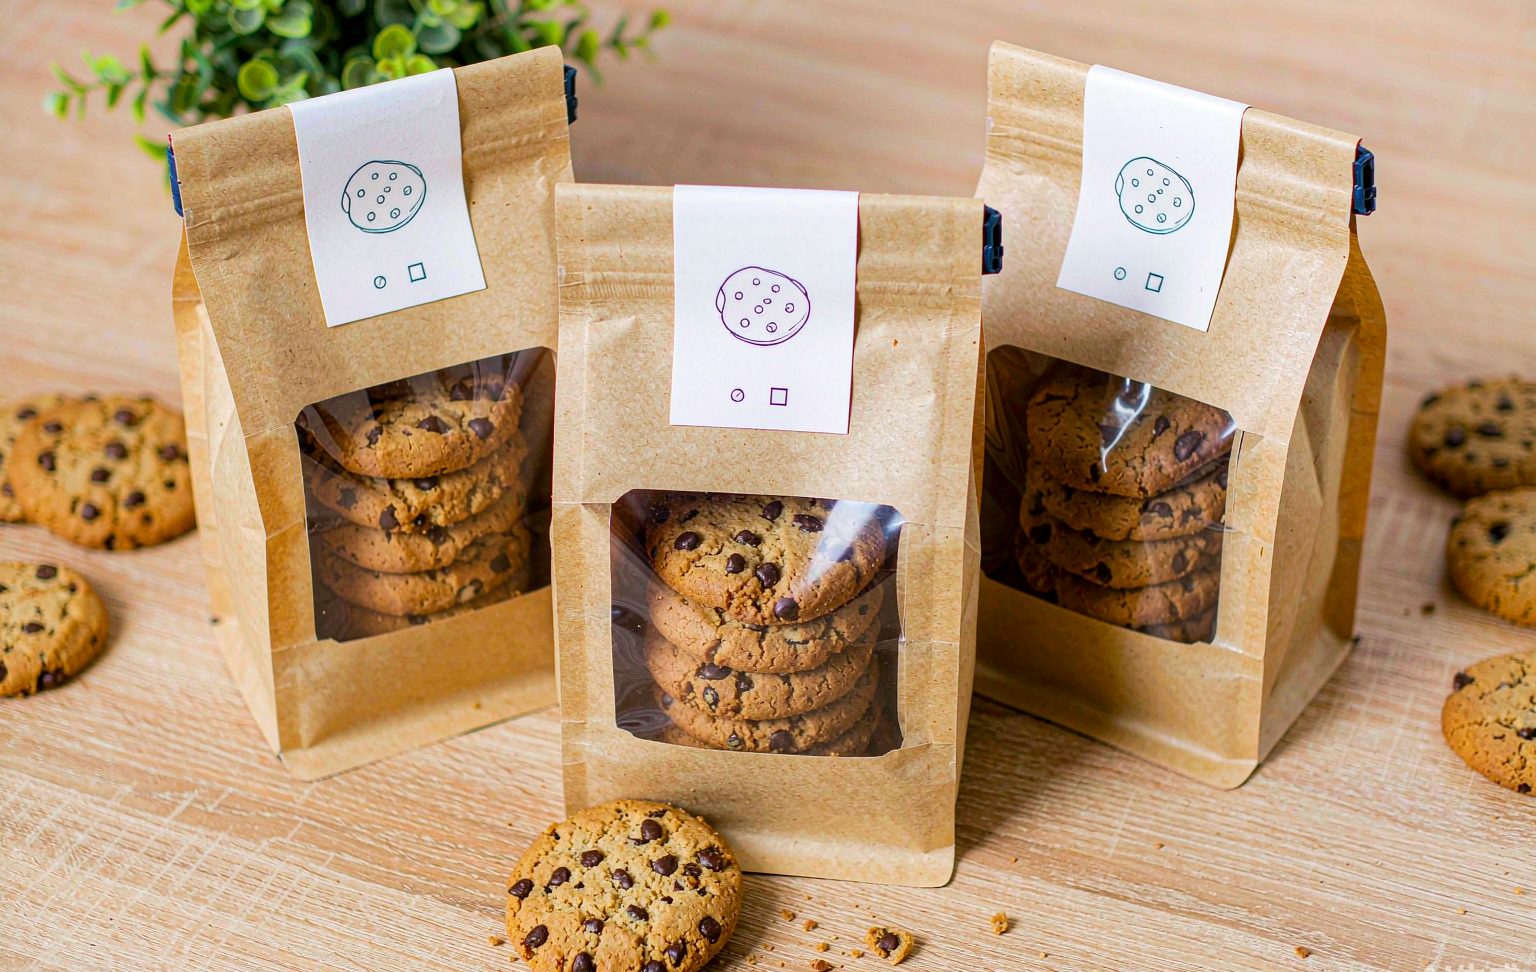
Quick Answer: How to Package Homemade Cookies for Sale
If you are wondering how to package homemade cookies for sale, the answer that works for most small bakeries is a heat-sealed kraft or stand-up window pouch paired with a label listing ingredients and your cottage-food statement. Heat sealing keeps cookies at 12–16% moisture for 2–3 weeks and survives shipping far better than ribbon-tied cello bags. How to package homemade cookies also depends on the channel: market stalls favor clear windows, while mail-order needs a puncture-resistant barrier and a rigid outer box. The table below compares the seven methods that cover 95% of home bakery situations.

| # | Method | Best for | Freshness window |
|---|---|---|---|
| 1 | Heat-sealed kraft window pouch | Markets & retail | 2–3 weeks |
| 2 | Stand-up zipper pouch | Multi-serving packs | 3–4 weeks |
| 3 | Clear cello bag + tin-tie | Gift sets | 1–2 weeks |
| 4 | Cookie tin + liner | Holiday gifts | 2–3 weeks |
| 5 | Rigid box + insert | Decorated sets | 1–2 weeks |
| 6 | Heat-sealed mylar barrier bag | Mail order | 4–8 weeks |
| 7 | Paper sleeve + belly band | Counter sales | 2–5 days |
In this guide:
- Why packaging decides repeat sales
- The 7 best ways to package cookies
- How to package homemade cookies step by step
- Labeling and food-safety rules
- Budget and value comparison
- FAQ
Why Packaging Decides Whether Customers Buy Again
A homemade cookie competes on taste, but the customer’s first contact is the package. Shoppers decide within 3–7 seconds, and the two signals they read fastest are a clear window showing the real product and a seal that looks professionally closed. That perception gap is the difference between a one-time sale and a monthly subscription customer, and it is the first lesson in how to package homemade cookies like a business.
Protection is the second job. Cookies are fragile, hygroscopic, and fat-rich, so packaging fights three enemies at once: crushing, moisture gain that softens crisp textures, and oxygen that stales butter and oxidizes chocolate. Any serious guide on how to package homemade cookies balances all three, because a beautiful pouch that lets humidity in generates refunds faster than no packaging at all.
The 7 Best Ways to Package Homemade Cookies
Each method below lists the materials, the sealing step, and where it wins. Learning how to package homemade cookies is mostly about matching those variables to your sales channel.
1. Heat-Sealed Kraft Window Pouches (the all-round winner)
A kraft paper laminate pouch with a 30–40 mm clear PET window and a heat-sealed top edge is the workhorse of professional home bakeries: the paper face carries your label, the window shows the cookies, and the inner PE lining blocks grease. Seal with a handheld impulse sealer on the 2–3 setting (about 1.5–2.5 seconds for 60–100 gsm laminates), leaving 10 mm above the cookies. New to sealing paper laminates? Our guide on how to seal kraft paper bags shows the dwell time that avoids burned wrinkles.
2. Stand-Up Zipper Pouches for Multi-Serving Packs
When customers buy a half-dozen or dozen cookies to eat across several days, a stand-up pouch with a press-to-close zipper is the most practical answer to how to package homemade cookies for repeat use. Choose a foil or metallized barrier layer for high-butter recipes; our overview of stand-up pouch styles explains which base shapes hold weight without tipping on a retail shelf. A 5.5 × 8.5 inch zipper pouch holds six 3-inch cookies with parchment between rows.
3. Clear Cello Bags with Tin-Tie Closures
When a guide on how to package homemade cookies needs the lowest-cost presentable option, a flat cellophane or PLA compostable bag with a tin-tie top wins for gift bundles and same-week sales. Pair it with a folded kraft card so the bag keeps its shape. Expect only 1–2 weeks of peak freshness because single-layer film has almost no moisture barrier.
4. Cookie Tins for Premium Gifting
Tins dominate December orders because they photograph well, feel substantial, and protect decorated cookies from crushing. For the holidays, how to package homemade cookies usually means tins: line with unbleached parchment, stack with a parchment round between layers, and add a 2–5 g food-safe desiccant sachet in humid climates. Tins are not airtight, so keep the freshness claim conservative.
5. Rigid Boxes with Inserts for Decorated Cookies
Sugar-cookie sets with royal icing need a 350–450 gsm box with a kraft or PET insert locking each cookie in its own cell, plus a clear lid so buyers see the design. This is how to package homemade cookies for wedding favors and corporate orders, where appearance outranks shelf life.
6. Heat-Sealed Mylar Barrier Bags for Mail Order
Shipping cookies across the country adds 2–5 days of variable heat and humidity. When mail order is the question, how to package homemade cookies has one clear answer: a 3.5-mil mylar laminate, heat-sealed on both ends, extends peak freshness to 4–8 weeks. Bag thickness matters here: our chart of standard mylar bag thicknesses explains why 3.5 mil is the practical floor for parcel handling.
7. Paper Sleeves with Belly Bands for Counter Sales
A folded kraft sleeve holding two or three large cookies, closed with a belly band printed with your logo, is the café counter classic: under 10 seconds per unit, cheap, and compostable. The trade-off is shelf life — 2–5 days only — so reserve sleeves for same-day consumption.

How to Package Homemade Cookies Step by Step
Whichever material you choose, the sequence for how to package homemade cookies stays the same.
- Step 1 — Cool completely (60–90 minutes). Cookies fresh from the oven release steam that condenses inside any sealed bag and softens crisp edges within hours. Sealing at 25°C or cooler is the single biggest freshness factor you control.
- Step 2 — Portion and count. Weigh one serving (2–4 cookies, 60–110 g); consistent fill weight is what customers photograph and review.
- Step 3 — Insert a barrier layer. One parchment round per row prevents icing transfer and fat migration that clouds windows within a week.
- Step 4 — Seal with a defined method. Impulse-seal pouches for 1.5–2.5 seconds across the full width, close tins with an “opened” seal sticker, and leave 10–15 mm clearance above contents — the technique from our kraft paper bag guide works for both pouches and sleeves.
- Step 5 — Label legally and practically. Product name, net weight, allergen list, the “made in a home kitchen” statement where required, and a “best within X days” date you can honor.
Labeling and Food-Safety Rules You Cannot Skip
In the United States, most states run a cottage food program that permits home-baked cookie sales with a compliant label; exact wording differs by state, so check your local health department’s current guidance before printing. Near-universal label elements: product name, ingredients by weight, major allergen declaration (wheat, milk, eggs, tree nuts, soy), net weight, and your name plus city.
Beyond compliance, honesty about shelf life protects your reviews. Low-moisture butter cookies stay pleasant 2–3 weeks in a heat-sealed pouch; chewy oatmeal and brown-sugar varieties taste best within 10 days. Print the conservative number — customers forgive a short stated life, never a stale cookie. For material trade-offs, see our comparisons of paper vs plastic bags and what a kraft paper bag is.
Budget and Value Comparison
Value for money decides margin, and it is often the tiebreaker when bakers compare ways of how to package homemade cookies. Kraft pouches and paper sleeves are the budget tier, zipper and mylar pouches sit in the mid tier, and tins or rigid boxes occupy the premium tier — the same ordering shown in the Quick Answer table. Price your cookies on the value the format adds, not on the packaging spend alone.

FAQ: How to Package Homemade Cookies
What is the cheapest professional-looking way to package homemade cookies?
A heat-sealed kraft window pouch is the cheapest option that still reads “professional” on a market table. The window shows the product, the heat seal looks machine-made, and a plain sticker label finishes the look.
How do bakeries that sell homemade cookies keep them fresh in the mail?
The core of how to package homemade cookies for mail is double packaging: cool cookies fully, seal them in a 3.5-mil mylar barrier bag, then cushion it inside a rigid mailer with 20–25 mm of void fill; peak freshness holds for 2–4 weeks in transit.
Do I need oxygen absorbers when I package homemade cookies?
No, not for 2–3 week retail windows; a good heat seal is enough. Oxygen absorbers matter only when how to package homemade cookies targets month-plus shelf life — mylar-sealed biscotti — paired with a genuinely high-barrier film.
How long do homemade cookies last in sealed packaging?
It depends on the method you chose for how to package homemade cookies: heat-sealed kraft or stand-up pouches keep butter cookies at peak quality 2–3 weeks, zipper pouches with a metallized layer reach 3–4 weeks, and mylar barrier bags extend to 4–8 weeks for low-moisture recipes.
What size pouch fits a dozen standard cookies?
Two rows of six 3-inch cookies fit a 6.5 × 9.5 inch stand-up pouch or a 7 × 10 inch flat kraft pouch with parchment between rows; add 15–25 mm of height clearance for the seal.
The Bottom Line on How to Package Homemade Cookies
Knowing how to package homemade cookies comes down to three decisions: pick a heat-sealed pouch format as your default, choose barrier level by sales channel rather than by price, and print the conservative shelf-life date on a compliant label. Master the 60-minute cool-down and the 2-second seal, and packaging becomes part of the product. Our full library of cookie packaging ideas builds on these methods, and the history of the chocolate chip cookie explains why it is the default home-bakery product.